Sitecore profile and pattern cards

Recently we were discussing around Sitecore personas, profile cards and pattern cards on how we can provide a connected and relevant user experience to our end users based on behavior and activities performed by the user on the site.

I later created a video of that so that it can be used as reference by others when needed,  here is the video from my youtube channel.


Hope it helps!!

Happy learning 🙂

Sitecore-how to create custom personalization rule

Personalization is the method for displaying targeted and relevant content to  website visitors based on different characteristics  like location, age, visits, etc.. There are several rules available out of the box in Sitecore which can be leveraged to personalize web pages.

Personalization-2

It is also possible that we have to build and create custom personalization rules to support certain business requirements, Sitecore architecture is flexible enough to support this scenario and can be extended to implement custom rules based on the requirement.

As part of this post, i would like to show how we can extend and build custom personalization rules, we will take an example of creating a custom rule where based on querystring parameter value how we can display different content to our site visitors.

Let’s take an example where we would like to show website visitor component-1 when user search for keyword=”content” and show component-2 when user search for keyword “management”.

Here are the steps to follow:

Step 1- First step is to create a new tag for our Custom rule under “/sitecore/system/Settings/Rules/Definitions/Tags” based on template- “/sitecore/templates/System/Rules/Taxonomy/Tag”

Sitecore-Tag

Step 2- Next- create custom Element and personalization condition under “/sitecore/system/Settings/Rules/Definitions/Elements”

Personalized-Rules

As part of personalization condition there are two fields to populate:

  • Text
    • It shows text that would be presented to content editors when using this condition with Rules Engine, this is what we have used in this example-
    • Where the querystring parameter search has a value that [operatorid,StringOperator,,compares to] [querystringvalue,,,Value]

    • Everything under square brackets []  would be replaced by Rules Enging as selectors.
  • Type
    • Type specifies fully qualified class and assembly names where we want to write/perform the business rule for the custom personalization condition.

Step 3- Next step is to assign custom tag which we created in step#1 to default element tag definition.

Element-tag

Step 4- Next- we would need to add this tag to conditional rendering such that this new rule is available in the rule editor for content editors to personalize the components, please make sure to name your tags and custom elements self explanatory as much as possible for better content editors experience.

conditional-rendering

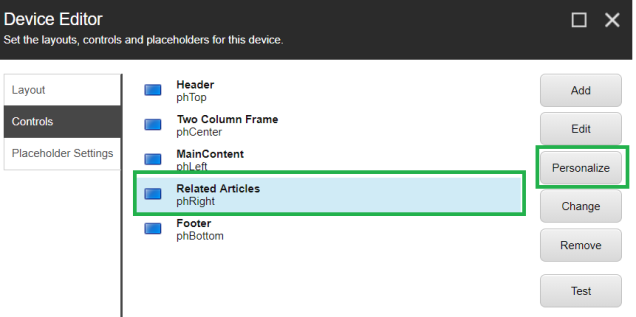
Step 5- Once all the above changes are made content/business editors can configure this rule to personalize the components from experience editor or content editor from presentation->Personalize section.

rule-editor

In the below code snippet we can see that we have created a class SCCustomRule which inherits StringOperatorCondition class and override Execute(T ruleContext) method -as we are trying to compare the querystring value of what has been configured in the rule editor and what has been actually entered by end user.

If the parameter values matches the rule is satisfied and the personalized component will be displayed else it would display the default component.

custom-personalization-snippet

Similarly we can create other custom rules to show more relevant and targeted content to our end users based on how they have interacted and what details they have stored in the system (internal/external)

Hope this helps.

Happy learning 🙂

Sitecore Basics- Introduction to Personalization

The scope of this blog post is to give an idea about personalization in Sitecore, why it’s required and steps to create  and configure personalization for the components, this is for beginners who are trying to understand the concept and how it can be implemented.

Personalization enables you to deliver targeted content to your visitors. For example, you can implement rules that show personalized content to visitors based on their browsing behavior and their accumulated profile values.
This is really important as you don’t want to show something to users which really doesn’t makes any sense to them.

Sitecore-Personalization

As an example- For an e-Commerce application as an business you want to show relevant information to users to get most of the conversions, this depends on number of factors, some of them includes:

  • User behavior
  • Location
  • Goals users have triggered.
  • Anonymous Vs Logged in users
  • Based on Subscription
  • Showing different banner images.

Sitecore XP lets you choose from several personalization approaches:

  1. Rules-based personalization: You define the conditions under which content is delivered to a customer. For example, you can set rules based on the IP address or physical location of your visitors, the keywords they use to reach your site, their mobile device, or the goals that they achieve on your website to determine the content that is displayed.
  2. Adaptive personalization- Use visitor profiles and pattern-card matching to dynamically adapt the content shown to visitors in real time. You can set adaptive personalization rules in Sitecore XP’s Rules Set Editor.
  3. Historical personalization: You can set rules that personalize content based on a contact’s historical or past behavior, rather than their actions from the current session (after all, context is what comes before and after the present).
  4. Test and then personalize: With Sitecore XP, you can use A/B and multivariate testing to assess your content and use the test results to optimize for conversion rates against your site’s goals. You can also use testing to assess which type of content works best with certain segments of your visitors.
  5. Journey-based personalization: Design user journeys with Sitecore XP using advanced business logic, and use them to help assess where your customers are in their journey with your brand. Then you can use triggers to advance them through their journeys in context of how far along they are.

We use Rule set editor (https://doc.sitecore.net/sitecore_experience_platform/digital_marketing/personalization/the_rule_set_editor ) to set the rules and action to perform and configure personalization for the individual components.

There are several out of the box categories which we can use to personalize the components, which includes:

  1. Campaigns
  2. Channels
  3. Date
  4. Device
  5. Fields
  6. GeoIP
  7. Tracking
  8. Visit and etc.

Personalizing the Component:

In order to personalize the component we have to make sure that the component which you are targeting to personalize should support datasource, this would help us in assigning different contents based on different criteria set.

Here are the steps to configure personalization for specific component(s):

  1. Select the component that you want to personalize, you can select the component either from presentation or from Experience editor.Personalization-1
  2. Select the component and click on Personalize button.
  3. Click on the “New Condition” button and add the rule which you want to add based on the requirement.
  4. Click on Edit button and add the rule.Personalization-2
  5. As an example- i am adding the rule which is based on field name compares to specific value.Personalization-3
  6. We can also define the default or fallback component datasource, if none of the conditions matches the default will be used.Personalization-4
  7. Once the configurations are done on the component, we can see an indicator in the presentation which shows that personalization has been applied to the specific rendering/component.Personalization-5
  8. We can personalize the component from experience editor as well.Personalization-6
  9. Now based on the condition which is added on the component, related content will be rendered else the default content will be displayed.


Custom Personalization:

There are certain scenarios where out of the box personalization which are available are not enough to handle the business scenarios, in those cases we have to think about creating custom personalization rules.

We need to create a class that inherits from Sitecore.Rules.Context and implement the Execute() method,and this is where all the business rule exits for the custom rule. We will be covering in a separate blog post about how to create custom personalization rule and applying it on the renderings.

Hope this helps.

Happy learning and wish you all a very Happy New Year 2018 🙂

References:

https://www.sitecore.net/solutions/personalization-segmentation

https://doc.sitecore.net/sitecore_experience_platform/digital_marketing/personalization